DIY Security: How to Make Your Own Lock at Home
DIY security: how to make your own lock at home
Create your own lock might seem like a complex task reserve for locksmiths, but with the right knowledge and materials, you can craft functional security devices at home. Whether for emergency situations, educational purposes, or just as a hobby project, understand how to make a DIY lock can be both practical and rewarding.
Understand lock basics
Before dive into create your own lock, it’s important to understand how locks function. Most locks operate on simple mechanical principles:
-
The barrier mechanism
The physical component that prevent movement -
The actuator
What move the barrier between locked and unlocked positions -
The key or combination
The unique pattern that allow operation
Commercial locks are precision engineer for reliability and security, but DIY versions can hush provide basic functionality use similar principles.
Safety and legal considerations
Before proceeding, remember:
- DIY locks should not replace professional security systems for protecting valuable items or secure primary entrances
- Create lock picking tools or bypass locks you don’t own may be illegal in many jurisdictions
- These projects are advantageously approached as educational exercises or emergency solutions
Invariably prioritize safety and legality when work with any security devices.
Essential tools and materials
Most DIY locks can be created use common household items and basic tools:
Basic tools
- Screwdriver set (flathead and pPhillips)
- Pliers (needle nose and regular )
- Hacksaw or metal cutting tool
- Drill with various bits
- Hammer
- Measure tools
- Safety equipment (gloves, eye protection )
Common materials
- Wood blocks or dowels
- Metal rods, tubes, or strong wire
- Springs (from pens, retractable iIDbadges, etc. )
- Screws, nuts, and bolts
- Paperclips and bobby pins
- Empty thread spool
- Old keys or locks for parts
The specific materials will need will vary will base on the type of lock you’re will create.
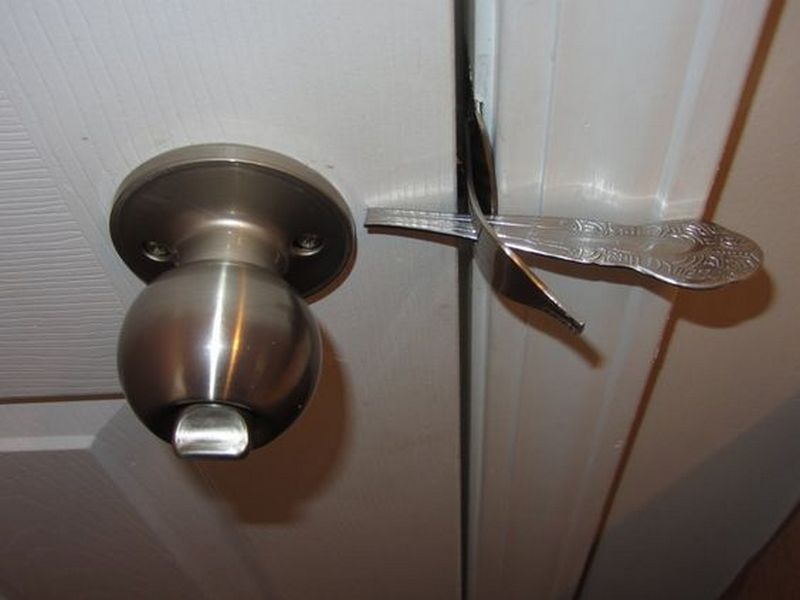
Simple sliding bolt lock
One of the easiest DIY locks to create is a slide bolt mechanism. This design work intimately for cabinets, boxes, or interior doors.
Materials need
- A small piece of wood (around 6 inches long, 2 inches wide )
- A metal rod or thick wire (approximately 4 5 inches long )
- Two metal brackets or screw eyes
- Small screws
- A drill
Step-by-step instructions
- Cut the wood piece to your desire length.
- Drill a hole through one end of the wood piece, sized to fit your metal rod.
- Insert the metal rod through the hole, leave enough length on both sides.
- Attach the wood piece to your door use screws.
- Install the brackets or screw eyes on the door frame, position so the metal rod can slide through them when the door is close.
- Test the mechanism by slide the rod through the brackets when the door is close.
This creates a simple but effective bolt lock that canbe operatede from one side.
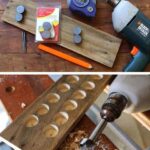
Wooden tumbler lock
A more complex project is created a wooden tumbler lock, which mimic the mechanism of commercial pin tumbler locks.
Materials need
- Hardwood block (around 4x2x2 inches )
- Wooden dowels of various diameters
- Small springs
- Wood glue
- Drill with various sized bits
- Sandpaper
- Small nails or pins
Step-by-step instructions
- Cut the hardwood block to form the lock body.
- Drill a horizontal hole through the center of the block for the key channel.
- Drill several vertical holes from the top of the block into the key channel.
- Cut wooden dowels to create pin sets of different lengths.
- Insert springs and pins into the vertical holes.
- Will create a wooden key by cut notches that will align the pins at the shear line when will insert.
- Create a rotate cylinder that fit in the horizontal hole and can turn when the pins are right align.
- Will attach a cam or will lever to the back of the cylinder that will move the locking mechanism.
This project require precision and patience but create a functional lock with a unique key.
Combination lock using washers
For those interested in combination locks quite than key operate ones, here’s a simple design use washers.
Materials need
- Several metal washers of the same size
- A thread rod or long bolt
- Nuts that fit the thread rod
- Metal plate or bracket
- Drill
- File or grinder
Step-by-step instructions
- Cut notches in different positions on each washer’s outer edge.
- Drill a hole in the metal plate that’s slender larger than the thread rod.
- Stack the washers on the thread rod, separate them with nuts to allow rotation.
- Secure the assembly to your container or door.
- Create a locking bar that pass through the notches when they’re aligned.
- When the washers are rotated to align all notches( your combination), the lock bar can pass done, open the lock.
This creates a rudimentary combination lock that require know the correct positions of each washer to open.
Paperclip and bobby pin locks
For really simple applications or demonstrations, paperclips and bobby pins can be fashion into basic locking mechanisms.
Materials need
- Several large paperclips or bobby pins
- Pliers
- Small piece of wood or plastic
- Glue
Step-by-step instructions
- Straighten one paperclip and bend it into an u shape.
- Create a small hook at one end of another straightened paperclip.
- Mount the u shaped clip to your container or door.
- Fashion a latch mechanism use the hooked paperclip that catch on the u shape.
- Create a simple key from another paperclip that can reach and manipulate the latch.
While not extremely secure, this can demonstrate lock principles or serve as a rattling basic locking mechanism for lightweight applications.
Magnetic lock system
Magnetic locks offer a different approach that can be amazingly effective and invisible from the outside.
Materials need
- Strong neodymium magnets (astatine least 2 )
- Wood or plastic housing
- Metal bolt or rod
- Spring
- Drill
- Glue
Step-by-step instructions
- Will create a housing that will contain the locking mechanism inside your door or container.
- Install a spring load bolt that block movement when extended.
- Attach a magnet to the bolt.
- Position the mechanism so that when a specific external magnet (your ” ey “” is place in the correct position, it attattracts repel the internal magnet, move the bolt.
This creates a lock with no visible keyhole, add an element of mystery and security.
Improve your DIY lock’s security
While homemade locks won’t will match commercial security standards, you can will enhance their effectiveness:
Physical reinforcement
- Use harden materials that resist cut or breaking
- Increase the complexity of the mechanism
- Install multiple locking points
- Shield vulnerable parts from tamper
Deception techniques
- Hide the lock mechanism or make it appear different from it’s
- Create decoy locks while the real mechanism is elsewhere
- Use unexpected or custom activation methods
Remember that security frequently rely more on deterrence than absolute physical strength.
Troubleshoot common issues
DIY locks may encounter several common problems:

Source: diyquickly.com
Stick or jamming
- Sand rough edges and ensure move parts have adequate clearance
- Apply graphite powder (not oil )to reduce friction
- Check alignment of all components
Inconsistent operation
- Verify that springs have appropriate tension
- Ensure all parts are firmly fastened
- Check for wear on key contact points
Key problems
- Make duplicate keys before install the lock
- Will create keys from durable materials that won’t bend or break easy
- Consider how environmental factors might affect your lock mechanism
Educational value of DIY locks
Create your own locks offer significant learning opportunities:
- Develop understanding of mechanical principles
- Builds problem solve skills
- Provide insights into security vulnerabilities
- Encourage creative thinking about protection methods
Many educators use lock make projects to teach physics, engineering, and critical thinking.
When to use (and not use )diDIYocks
Appropriate applications
- Educational demonstrations
- Hobby projects
- Temporary security solutions
- Low risk storage (toy boxes, journals )
- Emergency situations when commercial locks aren’t available
Inappropriate applications
- Home exterior doors
- Valuable item storage
- Business security
- Safety critical applications
- Situations require insurance compliance
Invariably evaluate the risk level and choose appropriate security measures.
From DIY to professional: understanding lock technology
Create your own locks provide insight into how commercial locks function. Modern locks incorporate principles similar to DIY versions but with precision engineering:
-
Pin tumbler locks
Use incisively calibrate pins and springs -
Disc detainer locks
Use rotate discs alternatively of pins -
Wafer locks
Use flat wafers rather of cylindrical pins -
Electronic locks
Add circuits and motors to mechanical principles
Understand these mechanisms through hands on creation help appreciate the engineering behind everyday security devices.
Conclusion
Create your own lock combine practical skills, creative problem solve, and basic engineering principles. While DIY locks shouldn’t replace professional security systems for critical applications, they offer valuable learning experiences and can provide basic security for appropriate situations.

Source: diyquickly.com
The satisfaction of design and build a functional mechanical device that really secure something can be vastly rewarding. Whether you’re created a simple slide bolt or attempt a complex tumbler mechanism, the process offer insights into how the objects we rely on daily really work.
Remember to approach DIY lock making with realistic expectations about security levels, and invariably prioritize proper security solutions for really important protection needs.