DIY Home Projects: Candle Making, Composting, and Jewelry Cleaning
DIY home projects: candle making, composting, and jewelry cleaning
Embrace DIY projects at home offer multiple benefits: save money, reduce waste, and provide a sense of accomplishment. Three specially rewarding home activities include make candles, compost kitchen scraps, and clean jewelry. Each project require minimal investment while deliver significant results. This guide cover everything you need to know to master these satisfy home skills.

Source: greenhomegnome.com
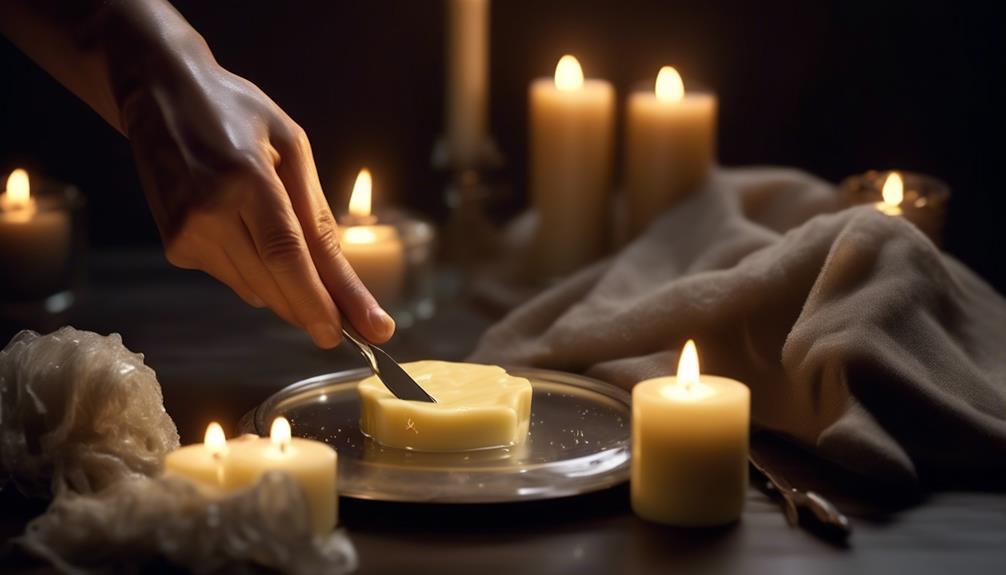
Candle making at home
Create your own candles allow you to customize scents, colors, and containers while avoid the chemicals ofttimes find in commercial products. The process is straightforward once you understand the basics.
Essential supplies for candle making
- Wax (soy, beeswax, paraffin, or coconut )
- Wicks with metal tabs
-
Heat-resistant containers ( m(on jars, teacups, etc. )
) - Double boiler or melting pot
- Thermometer
- Fragrance oils or essential oils
- Dye blocks or liquid candle dye (optional )
- Wooden skewers or pencils
- Scissors
Step by step candle make process
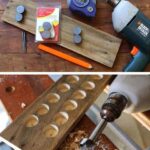
1. Prepare your workspace
cover your work area with newspaper or a drop cloth. Gather all supplies before start.
2. Prepare the containers
clean and dry your containers good. Attach the wick to the bottom of each container use a small amount of melted wax or hot glue. Center the wick and secure it at the top by wrap the excess around a pencil or skewer place across the container opening.
3. Melt the wax
set up your double boiler by fill the bottom pot with water and place your wax in the top pot. Heat on medium low until the wax whole melt. Monitor the temperature with a thermometer — most waxes should be heat to between 160 180 ° f ((1 82 ° c ))
4. Add color and scent
eEastmelt, remove the wax from heat and let it cool slimly to about 140 ° f ((0 ° c ))Add your choose dye and stir until whole incorporate. So add fragrance oils at a ratio of approximately 1 oz per pound of wax, stir softly for 30 seconds.
5. Pour the wax
cautiously pour the wax into your prepared containers, leave approximately half an inch of space at the top. Ensure the wick remain center.
6. Let cool and cure
allow candles to cool and harden wholly ((ypically 24 hours ))t room temperature. Trim the wick to about ¼ inch before lighting. For the best scent throw, allow candles to cure for 1 2 weeks before use.
Troubleshoot common candle make issues
Sinkholes or cracks
these oftentimes occur due to rapid cooling. Try pto preheatyour containers or perform a second pour after the first layer has partly cool.
Poor scent throw
this may result from add fragrance at excessively high a temperature or use insufficient amounts. Add fragrance at the recommend temperature and consider use premium oils.
Uneven burning
this typically indicate an improperly sized wick. Test different wick sizes with your specific wax and container combination.
Home composting basics
Compost transform kitchen scraps and yard waste into nutrient rich soil amendment, reduce landfill waste while create a valuable resource for your garden. The process harness natural decomposition to break down organic materials.
Getting start with composting
Choose your compost method
several approaches work wellspring for home composting:
-
Outdoor bin or pile
traditional method require space in your yard -
Tumble composter
enclose system that speed decomposition through aeration -
Worm compost (vermicomposting )
indoor method use worms to process food scraps -
Takashi
fermentation base method that can handle meat and dairy
What to compost
A successful compost pile need a balance of” green ” itrogen rich materials and “” own ” ” bon rich materials:
Green materials (nitrogen sources )
- Fruit and vegetable scraps
- Coffee grounds and filters
- Fresh grass clippings
- Plant trimmings
- Eggshells (crush )
Brown materials (carbon sources )
- Dry leave
- Shredded newspaper and cardboard
- Paper towel and toilet paper rolls
- Twigs and small branches
- Straw or hay
What to avoid compost
- Meat, fish, and dairy products (attract pests )
- Fats, oils, and greasy foods
- Pet waste
- Diseased plants
- Pressure treat wood
- Glossy or coated paper
- Citrus peels and onions in worm bins (harmful to worms )
Building and maintain your compost
1. Location
choose a level, wellspring drain spot with partial shade and easy access from your kitchen.
2. Start your pile
begin with a layer of coarse brown materials for drainage, so alternate green and brown materials in rough equal volumes.
3. Moisture management
maintain moisture similar to a wring out sponge. Add water if also dry or more brown materials if also wet.

Source: cleaningbasic.com
4. Aeration
turn your pile every 1 2 weeks use a pitchfork or compost aerator to introduce oxygen, which speed decomposition.
5. Size considerations
maintain a minimum size of 3x3x3 feet for outdoor piles to generate sufficient heat for decomposition.
Troubleshoot compost problems
Bad odors
typically indicate overly much moisture or green material. Add brown materials and turn the pile.
Slow decomposition
may result from insufficient moisture, nitrogen, or aeration. Adjust your green to brown ratio, add water iif neededeed, and turn more oftentimes.
Pests
bury food scraps in the center of the pile and avoid compost meat, dairy, and oils to prevent attract animals.
Harvesting and use compost
Compost is ready when it resembles dark, crumbly soil with an earthy smell, typically after 2 12 months depend on conditions. Use finish compost to:
- Amend garden soil before plant
- Top dress lawns and garden beds
- Mix into pot soil for container plants
- Make compost tea for liquid fertilizer
- Add to plant holes for trees and shrubs
Clean jewelry at home
Regular jewelry cleaning maintain brilliance and extend the life of your precious pieces. Different materials require specific cleaning approaches to prevent damage while restore shine.
General jewelry cleaning supplies
- Mild dish soap
- Soft bristled toothbrush
- Microfiber cloths
- Small bowls
- Bake soda
- White vinegar
- Aluminum foil
- Cotton swab
- Rub alcohol
Cleaning gold jewelry
Soap method:
- Mix a few drops of mild dish soap with warm (not hot )water in a small bowl.
- Soak the gold jewelry for 15 30 minutes.
- Lightly scrub with a soft toothbrush, pay special attention to crevices and stone settings.
- Rinse good under run water.
- Pat dry with a clean, soft cloth.
Bake soda method (for hard tarnish pieces )
- Line a bowl with aluminum foil, shiny side up.
- Place jewelry on the foil and sprinkle with bake soda.
- Pour hot water over the items.
- Add a tablespoon of salt to accelerate the chemical reaction.
- Let sit for 5 10 minutes as the tarnish transfers to the foil.
- Rinse good and dry whole.
Clean silver jewelry
Bake soda paste method:
- Mix three parts bake soda with one part water to form a paste.
- Apply the paste to the silver use a soft cloth or sponge.
- Rub lightly in a back and forward motion, follow the grain of the silver.
- Rinse good and dry with a clean cloth.
Aluminum foil method:
- Line a bowl with aluminum foil, shiny side up.
- Add 1 tablespoon each of bake soda and salt.
- Pour in hot water and add your silver jewelry.
- The chemical reaction will transfer the tarnish to the aluminum.
- After 5 10 minutes, remove, rinse, and polish dry.
Cleaning gemstone jewelry
Different gemstones require specific care approaches:
Diamonds, sapphires, and rubies
(hard gemstones )
- Soak in a solution of warm water and mild dish soap for 20 40 minutes.
- Softly brush with a soft toothbrush, particularly around settings.
- Rinse good and dry with a lint free cloth.
Soft or porous gemstones
(pearls, opals, aquamarine, amber )
- Wipe lightly with a damp cloth gently moisten with mild soap solution.
- Ne’er soak these stones as they can absorb liquid and become damaged.
- Pat dry instantly with a soft cloth.
Cleaning costume jewelry
Costume pieces typically contain base metals with plate and glue elements that require gentle treatment:
- Wipe with a cloth dampen with a mild soap solution.
- For metal parts, use a cotton swab dip in rub alcohol to remove tarnish.
- Dry instantly and good with a soft cloth.
- Apply a thin layer of clear nail polish to prevent tarnishing (optional )
Jewelry cleaning precautions
- Invariably research your specific gemstone or metal before clean.
- Remove rings before apply lotions, perfumes, or hairspray.
- Ne’er use harsh chemicals like bleach or chlorine on any jewelry.
- Avoid ultrasonic cleaners for jewelry with glue elements or fragile stones.
- Consider professional cleaning for valuable or antique pieces.
- Store jewelry pieces individually to prevent scratching.
Combine these DIY skills
These three home skills complement each other attractively. Use your homemade candles to create ambiance while work on other projects. Compost leftover wax paper and cardboard packaging from your candle make supplies. Clean your jewelry before special occasions, so light your handcraft candles to complete the atmosphere.
Take on these DIY projects not but save money but besides reduce your environmental footprint. Make candles eliminate package waste and allow you to reuse containers. Compost divert organic matter from landfills. Clean jewelry at home extend the life of your pieces and reduce the need for commercial cleaning products.
Start with one project that interest you about, so gradually incorporate the others into your routine. Each skill build confidence for tackle more complex DIY projects while create a more sustainable and personally satisfy home environment.